To connect to the Internet through a cable or broadband modem, your
Dell desktop
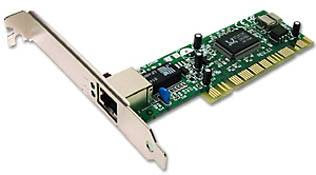
computer will have to have a device called an Ethernet card, which is also known as a network interface card. If your desktop for some reason does not have one, or the current one is defective, you can install one on your own by opening up the case and accessing the computer's motherboard
-
Step 1
Choose the option in the "Start" menu to shut down your Dell desktop computer. Remove all of the cables and cords from the back of the computer and then set it on its side on a stable work surface.
-
Step 2
Check along the left side of the computer case to see if it has any screws, if there is a large depression in the middle of the case, or if there is a metal tab where the side panel meets with the back metal panel.
-
Step 3
Push down on the depression in the case if it has one and then slide it back to remove the side panel. Pull the metal tab, if one is present, directly away from the case and then pull the side panel toward you to remove it. Use a screwdriver to pull out all four screws along the side of the case and then pull the side panel off if the computer has screws instead.
-
Step 4
Find the PCI card slot on the bottom left corner of the motherboard. Pop out the plastic cover over the card slot with your fingers and then remove the two screws attached to the case.
-
Step 5
Check the notches on the bottom of the Ethernet card and then press the card down into the slot in the correct direction. Connect the screws back into the case to hold the card in place.
-
Step 6
Slide the panel back onto the case and then reconnect the case screws if there were any. Plug the cables into the ports on the back of the computer and turn it back on. Navigate your web browser to the Ethernet card manufacturer's website and check to see if it has an updated driver to download, or instead put the installation CD that came with the card into your computer. Follow the on-screen instructions to finish the installation.


No comments:
Post a Comment