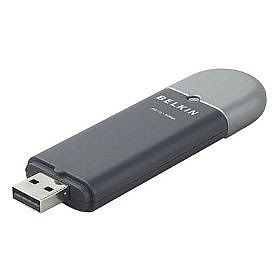
Learn how to install and use an USB
wireless network
adapter card to surf the internet.
-
Step 1
Many
wireless cards say they may not work with Vista, they usually will work however if you follow these steps. Step One: Plug in your USB Network Adapter to any USB port on your computer.
-
Step 2
After plugging in your USB Network card, Follow the New Hardware Installation wizard that should pop up in Vista. If you have used the wizard already with no success, don't worry. Just skip this step, it is not necessary.
-
Step 3
Go to your start menu and right click "My Computer", from the drop-down menu choose "Manage".
-
Step 4
In the manage window, on the right click "Device Manager". On the left you should see a list of devices known to your computer.
-
Step 5
Under the tab "Network Devices" you should see a yellow icon next to "wireless USB device" This indicated the device you plugged in has not been configured properly.
-
Step 6
Right click the "Wireless USB Device" you are trying to install and choose "Update Driver Software" from the drop down menu. This will bring up another box with two options.
-
Step 7
Click the second option which is "Browse my computer for software". On the next screen, if you have the CD that came with your
wireless card, type "D:" into the location field and select the box under that field that says "Include sub folders". If you do not have the Driver CD skip to the next step.
-
Step 8
If you don't have the CD with drivers on it find the name and model of your wireless card (its on the back of the card, do not mistake the MAC address for the model number, you won't need the MAC address right now). Go to the manufacturers website which you can find in any search engine, and look for a place to download the drivers. Download drivers into any folder you wish and repeat step 7, except instead of typing "D:" type the location of the folder where you downloaded the drivers. For example "C:\Windows\USERNAME\downloads".
-
Step 9
After you are able to install the drivers, you should be able to verify the card is working by going back to Device Manager (as described in steps 3 & 4) and looking in your "Network Adapters". If there is no yellow icon next your USB network device, you have installed this device correctly. Further verify correct installation by right clicking your device in the device manager and choosing "Properties", you should see a statement that "this device is working".
-
Step 10
Now the device is installed and ready to use. It will probably be blinking with a green LED depending on the model


No comments:
Post a Comment